Tuesday, July 31, 2018

Summer Salsa


This is the BEST salsa ever! Thanks to my sister-in-law for the recipe! 

2 (15 oz.) cans black beans (rinsed and drained)
2-3 diced tomatoes
1 onion, diced
2 peppers, diced
1 cucumber, diced
1 zucchini, diced
2 cups corn (using some that you froze off the cobb is best!)
1/2 cup vegetable or canola oil
1/3 cup red wine vinegar
2 tsp. cumin
1 tsp. garlic powder
2 tsp. or so cilantro

Combine all ingredients and mix well.  Store in refrigerator. 

Note: Feel free to add more or less vegetables based on what you have! I usually do not follow the recipe for the veggies for this recipe! I do make this year round!


Saturday, July 28, 2018

Funeral Lemonade


Funeral Lemonade

Well, this needs some explaining!

This lemonade is so good and has a ridiculous amount of sugar. That's probably why it's so good. But why is it called funeral lemonade? Because my church serves it at funerals!!!

The lady from church who gave me the recipe said to "just dump ingredients in".  I prefer to measure!

Mix to make one gallon  Country Time Lemonade 
1 cup sugar (more or less to taste, I stick with 1 cup. I know it’s a LOT!)
1 orange sliced
1/2 lemon sliced

Mix lemonade mix and sugar together in a gallon pitcher.  Add some water and stir. Add some more water (to make a gallon) and stir well.  Add in lemon slices and orange slices.

This lemonade is best if it sits for a little to blend flavors.

Variations:
Add more lemons or oranges.
Add orange juice instead of the oranges.

Serve in a pretty jar and you have some great lemonade!

I'll leave it up to you if you want to call it funeral lemonade!

Wednesday, July 25, 2018

7 Day Pickles!

This year, for the first time in a LONG time, I decided to make 7 day pickles.

For all your mommas out there, please know that for MANY years this just was not do-able! And quite frankly, after all the time and energy it really is cheaper to buy them in the store! BUT, my daughter loves growing pickles and I had this recipe from about 25 years ago, so I decided to make them!

I'm proud to say that canning methods came back to me after all those years! But, before I get too proud, please know that first batch I made of these should have been called 8-day pickles and the second batch should have been called 6-day pickles! (OPPS!)

7 lbs. pickles washed
8 cups sugar
4 cups cider vinegar
2 TBS pickling spice
2 tsp. salt (I don't usually add salt in any recipe)

Wash pickles. Put in a clean crock or bucket (something that can withstand boiling water). Boil water and pour over pickles. Do this on Day 1. Then empty water and boil new water for Day 2, Day 3 and Day 4. On Day 5 slice pickles. Make a syrup of 4 cups vinegar, 8 cups sugar, 2 TBS pickling spice, and 2 tsp. salt.  Bring to a boil. Pour over pickle slices. For Day 6 drain the sugar mixture and boil the sugar mixture. Pour over pickle slices.

Day 7: Boil entire contents - pickles and sugar mixture together.

In the meantime - make your mason jars hot. I put mine in a 300 degree (or 250 degree) oven.  Boil your lids (not rings) for your mason jars and put you canner filled with hot water on the stove (enough to cover the jars) to boil.

When everything is ready, take a hot jar, fill with pickles and syrup (check the rim of the jar first for cracks - run your finger over it. If it's smooth you are good to go.).  Take a spatula and put it down the side to get air bubbles out.  Wipe rim clean. Place a hot lid on the jar. Fill up 6 jars (that's how many you can probably put in your canner).

Put bands on the jars.  Process in boiling water in canner for 10 minutes. Once you take the jars out you may hear a popping noise. Make sure all lids stay down (If you push the middle they should not spring up).  Remove bands.  Store to enjoy another day!
Boiling syrup and cucumbers

Processing in the canner

Sealed and ready to enjoy later!


Monday, July 2, 2018

Norwex VS. Young Living


Ok, so this is a post I didn't think I'd write. But I just write them as they come.

Norwex vs. Young Living

First, I am a HUGE Norwex fan. Like really I love the stuff.  I use Young Living, but I have to admit it IS expensive. I know...you save on other stuff. Well, some days I'm not convinced.  

So I love to thrift shop and yard sale. I found this cooler for $5. I asked if they would take $3. They said yes. I was nearing the end of my yard sale time and seriously only had $2. They took it.  

I'm going to assume the cooler was used for marine purposes. If it was something else - no need to let me know. I'll just keep on assuming.

I brought it home, all excited to fix it up and had a use for it.  

First order of business was to order replacement latches. Thank you Amazon.  ✅
Next order of business was to clean the cooler.

Thank you new pressure washer.  ✅

Wait.

The pressure washer didn't work. Seriously? So I thought, "Ok, I'll soak it in clorox". However my husband first suggested bathroom tile clearer. We did both. No such luck.

I just let it sit and then finally decided to tackle it. (Clorox and water in a cooler will apparently attract and kill flies. Who knew?) I planned on using my Norwex cleaning paste.  But, just for fun, I thought I'd mix up a recipe I had printed from Young Living.  I asked my daughter which she thought would do better. She (without hesitation) said Young Living. I however, knew the Norwex cleaning paste would win.

And so it began! Fortunately I remembered to take a before photo!!
Ready to start cleaning! This is a mess!


So I started with the Norwex! Which I knew would win.  

This is after using Norwex and a LOT of elbow grease. I decided it wasn't worth the elbow grease!
I then decided to mix up the Young Living past using these ingredients.

The showdown. (Photo compliments to my 9 year old. Can you tell?
This was the side I started with for the Young Living mix.


This is me. Adding elbow grease. Either way it took a LOT but the Young Living mix definitely took less.
Almost done. But still needed some more work.  The Young Living mixture was amazing!!!! Don't be fooled though it still took elbow grease. I did need to mix up another half batch and then another half batch. The second time I mixed the liquid ingredients first and then added the baking soda.  That made more of a paste. 
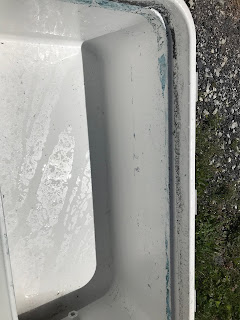
Almost done but I was determined to get the ring around the top where the lid rested clean. 


Finally done!  Was it worth it? The satisfaction of a job well done definitely was! Would it have been cheaper to purchase a new one? Hmmmmm....maybe.

The mix I used:
1 cup baking soda
1/4 cup Thieves household cleaner
1 tsp distilled white vinegar
10 drops lemon oil 
Combine in a glass bowl- texture will be like a paste. Store in an air right container and best if used within 3 months. Note: Mix liquid ingredients first then add baking soda!

Go here to start using Young Living and purchase the Thieves and Lemon Oil!